Monday, October 8, 2018

Halloween Birthday Card


I have been off grid for a long time, and I've truly missed it!  I went on a small vacation, and with the beforehand prep, the vacation itself, and the clean-up afterwards, it's been almost a month since I made a card!  I was jonesing at the two week mark!  I had received a ton of dies from Karen Burnistons' new release, and I still haven't had a chance to play with them! Most are still in their packaging, unopened!  So Sad!!!!!I hope to rectify that soon!  

Thank you all for your patience with me being gone so long. 


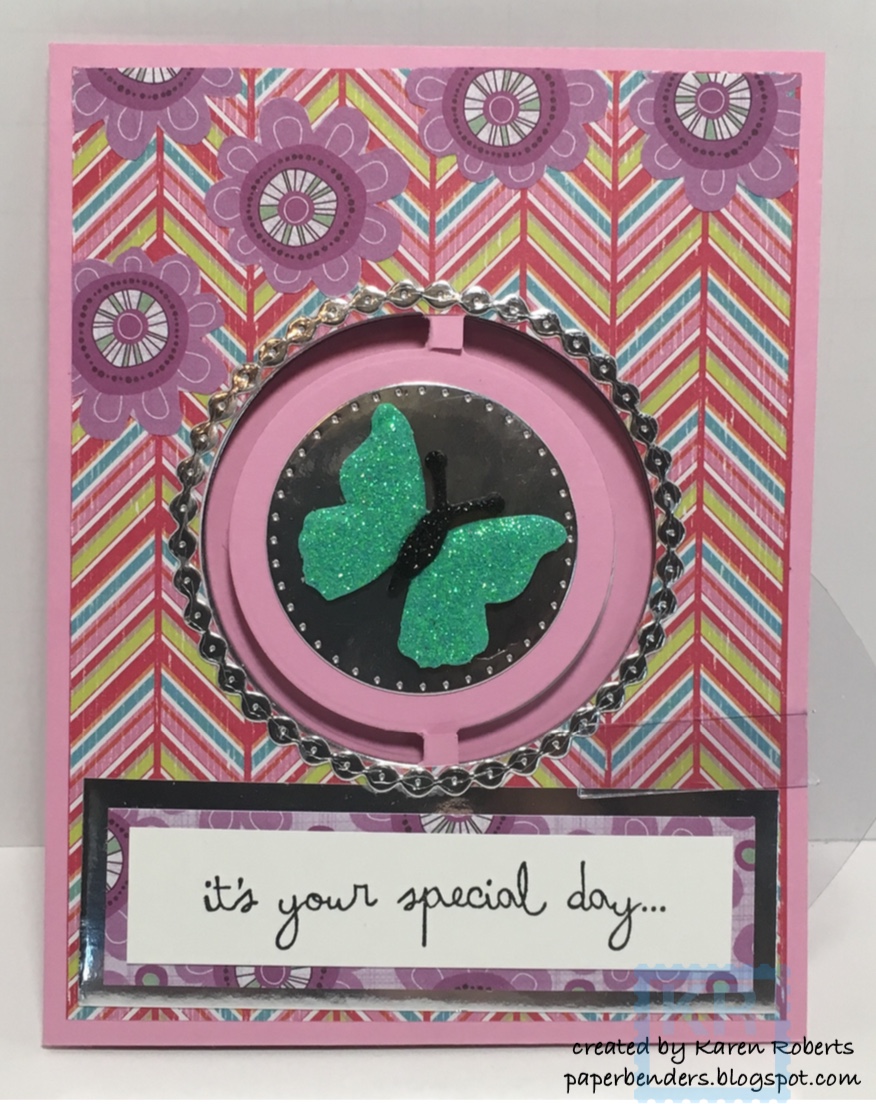
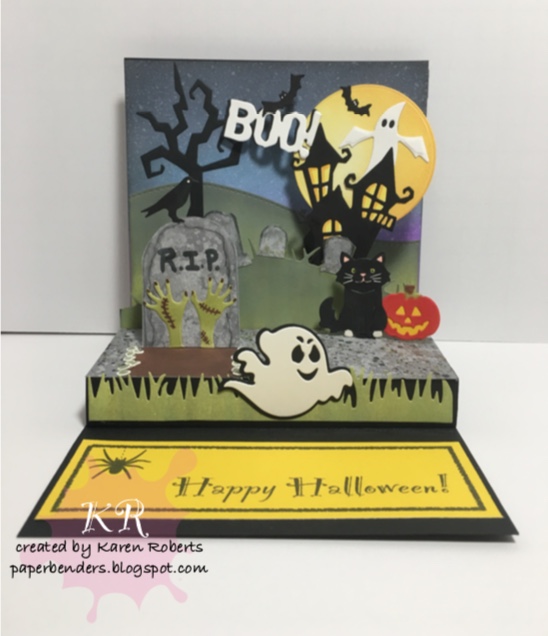
I have several friends/family with birthdays in October.  What better than a Halloween themed birthday card?!  I used several die sets for this card, some for the mechanism, some for the design elements.  The main one is the twist panel pop-up by Karen Burniston.  


For the card I used a 5 1/2  x 11" piece of card stock scored at 5 1/2".   To this I glued a piece of pattern paper cut slightly smaller than the base card.  

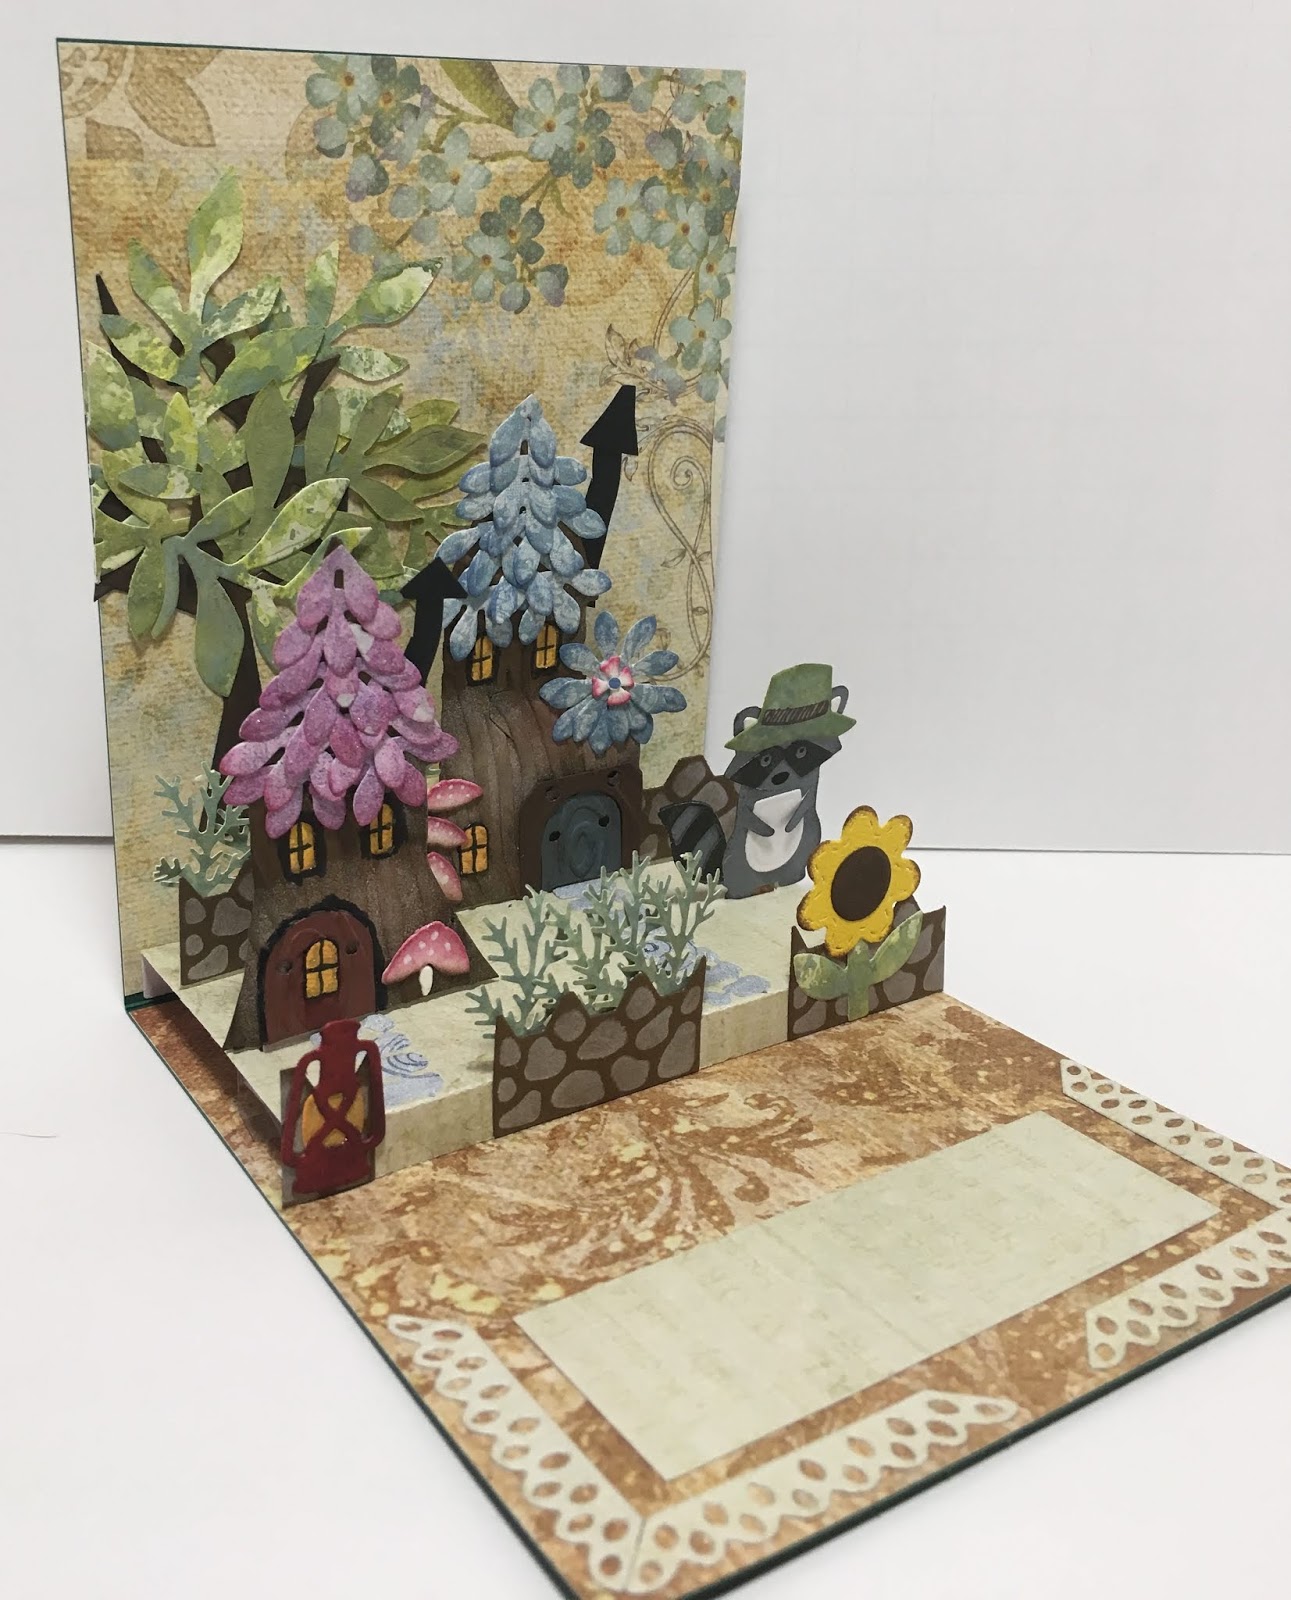
I made a panel 4 1/2" x 4 1/2" and did a inked background similar to the ones described below for the inside panels.  I added a tree made from brown card stock, and embossed it with a wood grain embossing folder, then I inked the edges with brown distress inks.

I matted this piece with black card stock cut slightly bigger than the panel and added it to the base card.  

I added the moon, the bat, the fence, and the grave site.

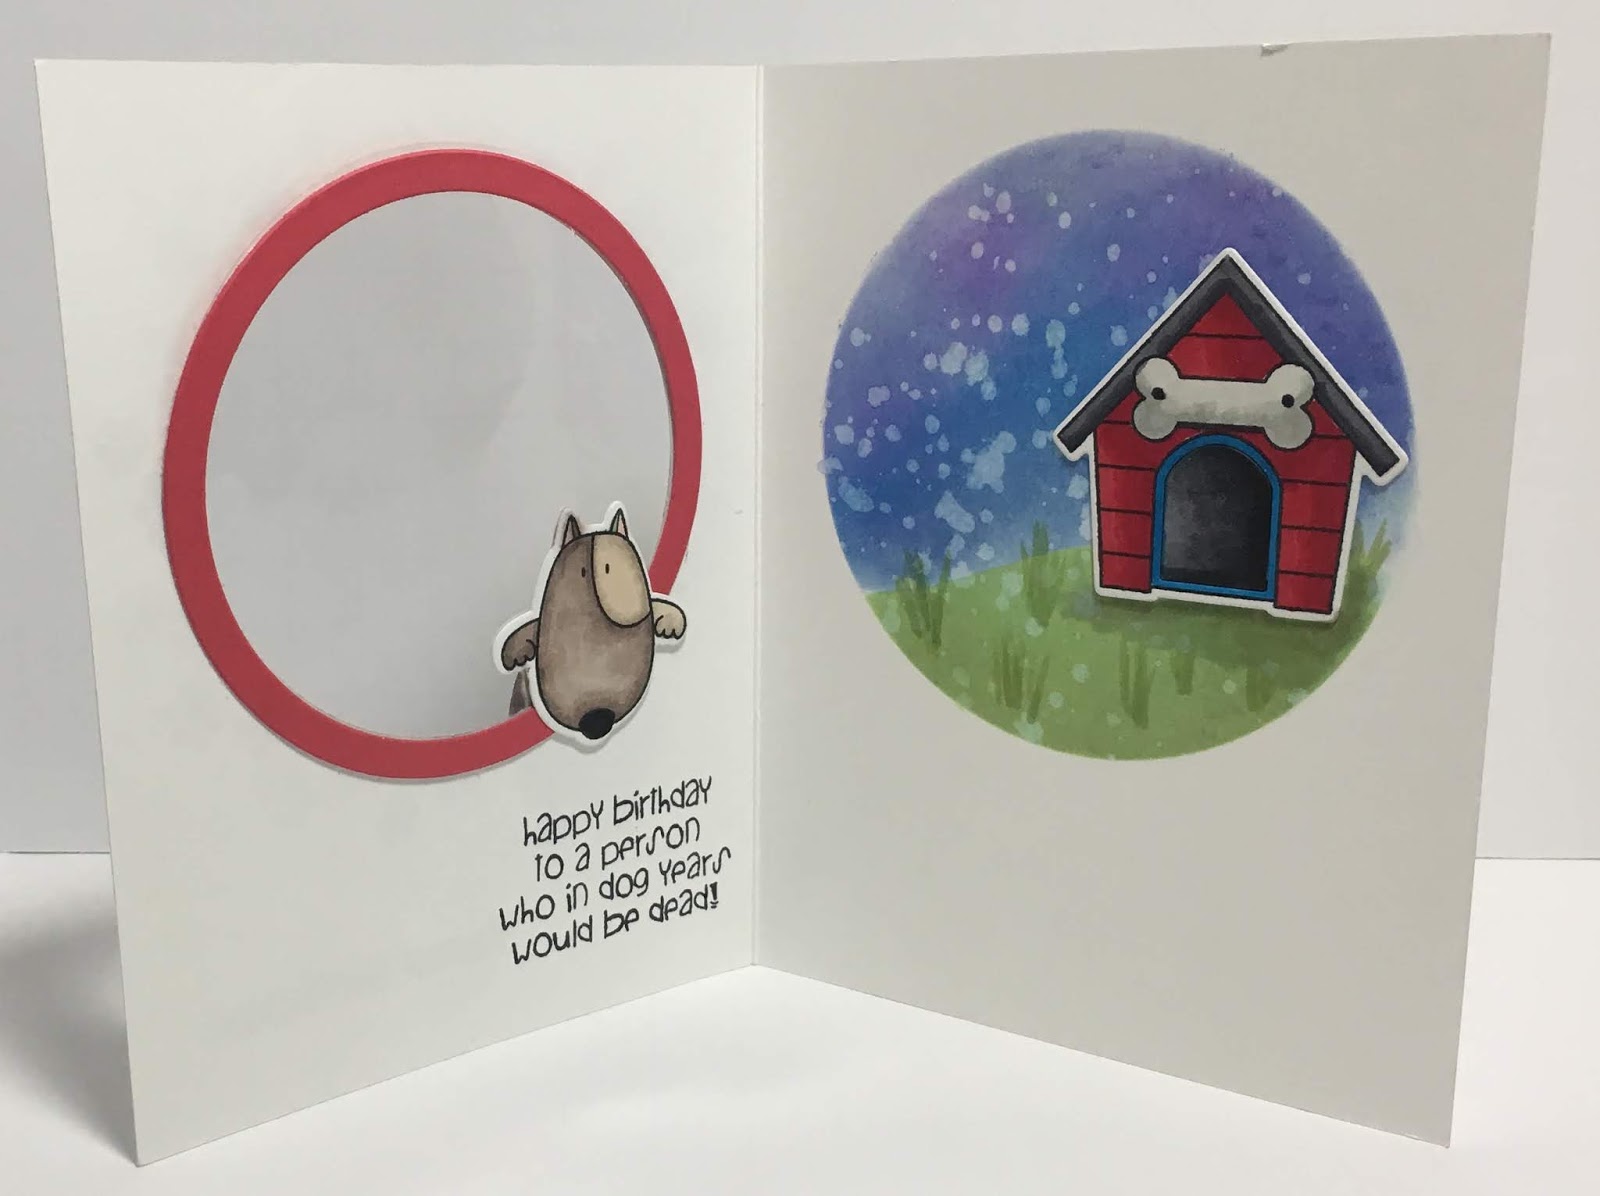
I did lot of inked back grounds on this card.  The picture below shows how I started with picked raspberry in the center of the panel, followed by wilted violet around the edges, and blended slightly with the picked raspberry.  I then used black soot to darken the panels.  Keeping  mostly to the edges, but also blending slightly towards the middle.  I made four of these for the panels, and one for the background for the front panel.  


I cut out a hill in green card stock, and darkened the edges with black soot. I cut two portions from the hill from the same die I used for the panels so that they would fit around the bottom and sides.  


For the other two panels, I cut out two fence sections from the House and Fence pop-up set. I glued it to the panel, and trimmed the edges.  


I then glued theses sections to the twist base.  I added spiders, ghosts, "boo", a bat, and a moon.  

For this card, I used the following  Karen Burniston die sets:

Twist panel Pop-up 
Halloween elements
Halloween scene
House & Fence pop-up
Snowman twist pop-up (for the moons)

Monday, September 24, 2018

You're one in a Million

This card is an anniversary card for that wonderful man I married 24 years ago! It's hard to believe it's been that long!

For this card I used masking techniques.   

I started out with a penguin stamp, (he LOVES penguins)  and immediately stamped two images onto masking paper, then fussy cut them out.   I use post-it-notes for the masking paper.  I found some with almost full adhesive on the back.  It seems to hold up the best for multiple applications.  

Starting on the bottom row,  I stamped my penguins.  On the second row is when I needed the masks.  I would place both masks, and stamp the penguin between the masks.  I repeated this all the way up.  

I colored these little cuties with alcohol markers.  The tummies were done with ink daubers.  I did one a different color to make him stand out, then I added a bow tie and hat to make him stand out even more.   The eyes are darkened with glossy accents.

After coloring all the penguins, I fussy cut the top of the page,  and the bottom of the page,  and mounted that to fun foam.  I  added a 4" x 5 1/4" piece of pattern paper to a card base,  then mounted the penguin panel to that.  

The sentiment is computer generated and popped up with fun foam.


Onto the inside...


The inside has pattern paper added to the base card, and the the Katherine Label Pop-up (by Karen Burniston) was used.  I added two penguins, one is popped up, one is adhered directly to the card.  A few hearts, and an area to sign the card.  

The sentiment on the label is also computer generated.  I mounted that onto some card stock that matched the front paper. 

This was a fun card to make!  Come on!  Penguins!  Who doesn't like penguins?! 

Materials used:

Karen Burnistons' # 1011 Katherine Label Pop-up 
Karen Burniston Props 1
Simon Says Stamp Wild Cuddly Critters

Monday, September 10, 2018

Circle Charm Pop-up


This is my first time using this particular die set, so I've kept it pretty basic.  I need to build the sets, at least once,  before I can figure out different ways to use them.  After designing this particular card, I've learned enough to possibly use it in different ways.  


Let me start off by saying I had laid out all my pattern papers, and card stock before I had started this card.  Not being used to this style of card, I later had to make adjustments.


I fell in love with this sweet floral print!  It was slightly retro in feel and I knew it would be perfect for my Niece's birthday card!

This style of card actually builds best if you do the inside first, but keep in mind, what ever you put on the first circle will be on the front of the card.

It starts with a 4 1/4" x 5 1/4" card base.  I used pattern paper for the front and insides cut slightly smaller as to show a border.  I only adhered the pattern paper around the edges on the front, and inside left panel.  BEFORE DIE CUTTING!

This was so I could remove the paper off the circle portion of the card after I die cut the pop-up.  I added the decorative circle frames BEFORE I adhered the circles together.  

The butterflies are cut from glittery fun foam.  I cut one black, one green, and two from black card stock.  I cut the butterflies apart, then I paper-pieced them back together using all fun foam on the front one.  

The center butterfly is made up of card stock with a fun foam center.  I sandwiched the two black card stock butterflies with a clear acetate strip between them so I could suspend the "charm" in the second circle.

Note: if you use this product, do not run the entire sheet thru the BigShot.  It is self adhesive on the back, and it distorted the rest of the sheet after passing thru the BigShot.   I'd recommend cutting off a piece, slightly larger than the die you are using, that way the rest of the sheet is still left in good order.  

The sentiment is stamped with distress oxide ink then heat embossed with clear embossing powder.  

After getting the card all assembled, I loved the inside.  The outside?  Different story!  The pattern paper didn't really look like it matched anymore!  UGH!  I know we've all experienced this before!   I didn't have enough paper left over to re-cover it!  I decided to try putting a sentiment on the front using a bit of the pattern paper form the inside.  

That only kind of worked.  So then I fussy cut the flowers from some scrap of the inside paper, and glued them on.  Whew!  I'm glad it worked!  I did not have enough metallic silver left to re-do the front either!  

Another Note:  As I mentioned, I was running short on the silver paper, and after building the inside, didn't have enough left to cut a circle frame for the front.....Yes, poor planning!  So instead, I used the braided circle from the Snowman Twist Circle pop up.  I was able to "piece together" the circle edging, and you can't even tell! 

I love how interactive these die sets from Karen Burniston are!  They all play well together.  If you only invested in these sets alone,  you would have enough dies to make almost anything!  Especially if you mix in stamps for different themes!

Hope you all learned something from all my boo boos!  I know I did!

Happy Crafting!

ttfn: Karen


Wednesday, September 5, 2018

Organizing Die Sets

Sorry I've been AWOL the last couple of days....

...I decided to organize all my dies.  I did not realize what a huge undertaking this would be!  I've lost three full days of my life doing this!  I must say though....It was really worth it!!

Have you ever gone looking for something only to finally find what you are looking for at the end of the pile, or worse yet, going thru it twice cuz you missed it the first time?  Can we say....

Time waster!  Frustrating!  Daunting if you have a lot of dies!  

Well, no more!  I came up with an idea a while back to put my dies into 3 ring mini binders.  I wanted to try it for a while before committing to it to see if it would work.  

So I made a few binders with only some of my dies and tried it for a month.  It dramatically cut down on my time searching for dies.  It worked so good, that I decided to tackle the rest of my collection.    

I found the perfect (for me) binder by "Pen + Gear".  Its a good size.  Not too big so as to be heavy when loaded, but not too small as not to hold enough dies!   They also make the clear protector shields to fit these binders.  


Hopefully this all makes sense.  I started with  a 5 1/2" x 8 1/2" piece of card stock scored at 1" from the bottom.  To the front I glued the cover of the die package.  If that wasn't available, I used an actual die cut out.  This was so that from either side of the page, I could see which die set was in the sleeve.


To the back side of the card stock I glued a magnet sheet large enough to hold the dies.  I folded at the score line towards the back of the page.  This will catch a die in case it slips off the magnet. 

I then put this into the protective sleeve.  I found out (the hard way), the pages could/would slip out of the rings sometimes, so I used ring protectors on the holes.  This stopped that problem.  

I made my own tab sheets to divide the books into categories.  You can purchase them if you don't want to make them. 


Each book has different themes.  For example...

One book holds only pop-up die sets.  This particular book has a table of contents page, and 5 tab pages.  The tab pages are labeled A-E and I used them to sub-divide, to ease looking for certain sets.  On the table of contents page, I can then list which dies are in certain tab sections.  

Another book contains circles, squares, rectangles, etc.  This book just has tabs separating the different types of dies. 

Yet another book is divided by months for holidays.  

Basically you can divide and sub divide however works best for you.  


Here they are, all lined up on a shelf...  Notice how I have a removable label on the spines.  This allows for change as your collection expands.  


I even dedicated a book to all the components, and templates to make more sleeves.  


I must say....I had WAY more dies than I had at first realized, and this project took longer than expected,  BUT...I am so glad that I took the time to do this!

I found most of the supplies at Walmart:  
  Pen + Gear 1"Mini binders
  Pen + Gear Mini sheet protectors
  3 ring hole reinforcements

I found these items at Staples:
  Heavy weight card stock (for tabs and sheets.)
  Post it Note removable label tape

Happy crafting everyone!

ttfn: Karen


Saturday, September 1, 2018

Woodland Wonderland

This was a FUN project! As I lay in bed this morning, I kept seeing little fairy woodland type houses in my head!  Well, we all know what that means!  Get out of bed and make a card!  YeeHaw!  I love it when my day start out like this!


I kept the front very simple.  It's a 4 1/4" x 5 1/2" card base.  To this I glued some pattern paper leaving a small border around the edge.  I did a sentiment using an old stamp and the banner die from the Ups Daisy Pop-up set.  I mounted this on a piece of card stock the same color as the base of the card.  I then made this dimensional by mounting it with fun foam.  


 Let's start with these babies!  As you can probably tell, these started out as parts of the castle pop up set.  See the drawbridge?!  First, I die cut the castle piece.  I cut it into 2 sections making use of the two turrets.  

I then ran them thru a wood grained embossing folder.  I distressed them with ink, glued some yellow behind the windows, and attached the doors.  

Then I cut out another castle to use as a backer piece for the houses and glued it to the back of the houses. 

Next, I cut out flowers from the ups daisy set (the smaller one).  I inked the edges, then cut them in half.  I used these pieces for the shingles on the roofs.  I layered them up starting at the bottom of the roof and working upwards.   

I hand cut a chimney for each house, and glued it to the back.  The mushrooms were random pieces of waste from die cuts.  I inked red on the top, brown on the bottoms, added some white dots, and Voila'....Mushrooms!

I added an additional flower to the right side of the blue house, and once again, using the waste from die cuts, I made a center for the flower.  


 I used random papers for the background and lower portion of the card and glued these to the card base.  I then added the floating floor from the house and fence pop up set.  

I added the houses to the various pop-up mechanism and added the stone walkways from the house and fence set.
  
The tree in the background was from the halloween scene die set.  To that I glued leaves made from the leaf die from the flower pot  set.  

The raccoon is from the woodland animals set.  The lantern and the hat on the raccoon are from the camping charms set.  The fence/wall pieces are from the castle pop up set.  The ferns on the wall sections are from a Martha Stewart leaf punch. 

All the papers for the leaves & flowers were made using distress inks, and water.  

The sun flower is from the ups daisy pop up set.


 The flourishes on the floor of the card are from the square spinner pop up set.  I used them to partially frame the area where I will sign the card.  


 So in this card I used mostly Karen Burniston dies.  I used:

1001 Woodland Animals
1049 Camping Charms
1033 Castle Pop-up
1014 Halloween Scene
1015 House and fence Pop-up
1042 Spinner Square Pop-up
1010 Flower Pot Pop-up
1047 Ups Daisy Pop-up

I also used A fern leaf punch from Martha Stewart.  

This card was a BLAST to make!  I needed this boost after finding out I didn't make the cut for the design team member position I was going after.  There is no better way to raise your spirits, than to make a card.  At least not for me! 

Happy crafting!

ttfn: Karen


Friday, August 31, 2018

Wild Thing

Here's a fun and fast little card using Simon Says Stamp Wild Cuddly Critters (#101704).  I LOVE this stamp set!  Wild Critters and a few fun sentiments! How great is that?!


I started with an A2 size card base.  I pretty much matted all the layers with a brown card stock that tones with the pattern paper. The sentiment and the giraffe are from the afore mentioned stamp set.  They are colored with Spectrum Noir Alcohol Markers.  

The circle the giraffe sets on is popped up with fun foam.  


The inside sentiment is computer generated.  I wanted something a little sassy!  The rest, I kept it fairly simple on the inside.  Lots of room to write a note.  

I have made several cards with this stamp set.  Each one has had much appeal, and the critters are fun to watch come to life as you color them!  


Hope you enjoyed this fast & fun little card.  

Happy Crafting!

ttfn: Karen


Tuesday, August 28, 2018

Christmas Humor

I've seen a few cards made with Karen Burniston's Flower Pot Pop-up (#1010), and they were all VERY pretty.  I personally, wanted to do something different with this die set.  I've seen some pretty neat ways to change this set up...

Here's mine...


Rather simple on the outside.  I started with 2 pieces of heavy weight card stock measuring 5" x  5".  I added a  2 1/2" x 4 3/4" piece of decorative paper, then bordered it with the chain outline from the Snowman Twist Circle pop-up ( #1012).

Funny thing...The chain starts out as a circle, but I found that if you cut it to open the chain,  you can stretch it lightly, and it'll straighten out.  That piece I glued to the edge of the pattern paper.  

I like the shape of the leftover piece from the chain, so I cut it out in Red, and used the inside piece as a background for my sentiment.  The white part is the smallest circle from that set.  All the sentiments are from Hero Arts (# DC221).  The sentiment medallion is popped up with fun foam. 

The flowers are from the Flower pot set.  Inked, then doubled layered.


I went for Santa legs instead of flowers!  The papers and the sentiment is done the same as on the front of the card.  I just changed the sentiment.  What can I say...I have a twisted sense of humor!  

I used white glitter paper for the snow on the roof (4 3'4" x 6" scored in the middle),  and cut the pop-up mechanism into that.  I didn't want fold-in-fold issues this card, so I glued this to the 2 panels I cut for the front, then added the pattern paper and more chain. 

The chimney is constructed basically like the flower pot with the exception that I trimmed the flaps so they wouldn't over lap at the sides.

I drew a pair of legs and boots out of red card stock, colored the boots black with alcohol markers, added white gel pen laces and cuffs.  I then glittered the cuffs.  

To place the legs, I had originally just cut a slit into the top of the legs and glued it to the cross members in the chimney, but I could see the slit, and it looked bare.  

I then cut the front two cross members out  of the pot, and added part of a cotton makeup circle....yeah, I know...we crafters will used the weirdest stuff sometimes!  I figured it looked fluffy, and it would fold easily.  It did, and it does.    

The flaps are covered with glitter paper, and the chimney parts are red card stock sent thru an embossing folder, then inked with white to give it a distressed look.  

It's a tiny bit bulky, but with a little extra care, it could still be sent through the mail. 

Happy Crafting!

ttfn: Karen


Friday, August 24, 2018

Thinking of You


After this card was done, it almost seemed like I was on a mission to use as many Karen Burniston Dies as possible!  That was not the case, although I did use four of them.  I will list all of them at the end.  


This card measures 4 1/4" x 5 1/2"

On the front, I made the Terra-cotta pots, leaves and flowers by water coloring distress oxide inks onto paper, then cutting them out.  The flower centers are made with Neon Puffy Paints.  When they were dry,  I inked dots on them with a fine line sharpie.  The Sentiment is from a generic set, white heat embossed, then mounted to fun foam for dimension.  A small stripe of card stock at the bottom.  


Basically, I installed the platform, then turned the card so that the platform was on the back wall instead of the floor. 
   
The background is made with a brick embossing folder from Paper Studio, then inked lightly with Faded Jeans distress oxide ink.  I cut around it to fit around the floating floor.  (In this case, the floating wall!)  On the surface of the floating floor (wall),  I added two pots with the flowers & leaves.  They were mounted on either side of the middle pop-up.  I was quite surprised to find the they fit perfectly!  

The middle pop-up holds Buster the dog!  I found some scraps from when I was playing around with water colors, and decided to make Buster out of that instead of traditional colors.  

The floor of the card is paper from my stash, along with the napkin from the Coffee Cup Pop-up.  I used the stencil feature to add some dimension to the "rug."  I then cut this to fit around all the pop-ups on the floor.  (Remember, this would normally be the back wall of the card.)

I added a bone for Buster, and a white area that holds the sentiment from Stampendous SSC1223, as well as give an space to sign the card.  

So, in this card I used the following Karen Burniston Dies:

1015 House & Fence pop-up (used for the floating floor)
1010 Flower Pot Pop-up (used for the leaves, flowers & pots)
1040 Coffee Cup Pop-up (used the napkin for a rug)
984 Buster the Dog (retired Die) used for the dog & the bone

I made the flowers, leaves and pots quite a while ago, and don't remember which distress oxide colors I used.  

I hope you enjoyed the card.  I like to try and use these pop-ups in a different manner than they were intended.  I feel that this makes them more versatile.  

Happy Crafting!
ttfn: Karen

Wednesday, August 22, 2018

Not every card is a Pop-up


A while ago I came across a card similar to this on YouTube, and couldn't resist making my own version.  I just LOVE the dog.  The entire stamp set is quite cute!  It's "My Favorite Things # BB13, you make my tail wag" stamp set.  Dies are also available.  


On the front of the card, I cut out a circle, and stamped around it with the paw prints from the stamp set.  I used two different colors for interest.  The sentiment is from another stamp set, Stampendous #SSC1223.  It has various "dog" sayings and is great!

I put clear acetate over the circle cutout on the inside.  The dog was colored, cut out and pasted over the opening. 


The inside has the rest of the dog!  And, yes, that's part of the set!  Cute...huh? I cut out a circle frame, and glued it over the acetate, and added the Dog's face.  The sentiment is from the same set as the "Yappy Birthday" from the front of the card.  

On the right hand side of the card, I masked off a circle, and using distress inks, worked in the sky and the grass, then sprinkled water on it and blotted it off to get some texture.  

I added a few grass patches with alcohol markers, as well as a shadow under the dog house, which was also part of the same stamp set as the dog.  

These are two really fun stamp sets, and I've gotten a lot of use out of them  If you're into puppies, these are the stamps for you!


Baby Girl Card

New Baby Girl Pop-up Card


I found out our Granddaughter is scheduled to deliver our first Great-grandchild on Monday! We can't let that event go by without making  a special card! Yeowza!

Lucky for me, my new die set, Karen Burniston #1015 House & Fence Pop-up, came in the mail on the morning that we got the news!  Kismet?! I think so...

I decide to make a welcome card for our new Great-granddaughter Vivian as a twist on the normal...Congrats on your new baby theme.   


I started with a 4 1/2" square base.  Next was a layer of green cardstock.  The white layer was done with a cross stitch background die set.  The label was 2 Katherine labels (Karen Burniston Pop-up die set #1011) inked, stacked, & raised with fun foam.  

The sentiment was an Impression Obsession die # DIE527-J.  I put white dots on the "girl", and used Wink of Stella on the entire sentiment.   The rattle was from the stamp set "Lawn Fawn plus one" as were the baby items on the inside of the card. 


On the inside I inked a background.  Added the Stork, and 2 clouds.  The rest of the clouds I attached to the house. I wanted a 3-D effect.   The cat was another Karen Burniston die, #1024 Cat & Dog.  The house, fence and grass area were all part of the house pop-up set.  

The sentiments on the inside were computer generated.  I added wink of stella to the buggy, the cat's collar, the windows, and the edges of the stork.  


This was a fun pop-up card!  It went together well,  and I think it came out rather cute.  You could use this die set for so many different themes.  I would recommend this die set for anyone!  I hope you give it a try!

Happy crafting!

ttfn: Karen


Saturday, August 18, 2018

Any card can be a Pop-up!

Ugh!  It's been a while since I've been able to make any cards, let alone post anything!  I've missed it!  

Life threw me one of its little curve balls,  and knocked me out of the saddle!  I am back on the horse (so to speak), trying to get back into the groove.  

I actually sat at my desk for several  days with my version of "writer's block."  That was fun!  NO IT WASN'T!!!

I tell you all this so maybe you can understand why my card is a little more simple than usual.  

Having the fun little case of writer's block, and not winning against it, I decided to take a card that I had made a year ago, and adapt it to become a pop-up card.  Thereby proving that ANY card can have the ability to be a pop up.

Usually, most of the wow factor is on the inside of a pop-up.  This time, I just let the pop-up hold the message, and left areas to actually write something on the inside of the card.  The main focal point is the front of the card this time. 


The front of the card is mostly layering cardstock, and popping things up. The cardstock behind the flamingos is done with distress inks & water (sprayed, then blotted off).  The flamingos are colored with Spectrum Noir markers.  The sentiments and Flamingos are all stamped with black ink, then heat embossed with clear embossing powder.  The heart is watercolored with distress ink.

 I used fun foam to pop up the large square, and the flamingo.  I especially like using it because it works wonderfully.  You get a solid surface behind whatever you're popping up.  You can use glue or tape runner.  It's relatively inexpensive and it goes thru the mail with less damage to the card when used behind larger images.  Best of all....you can die cut it!


The inside is done by using the Katherine Label (Karen Burniston Pop-up die) and minimal decorations also from that die set.  I kinda like the simplicity for a change.  

Products used:

Katherine Label Pop-up (Karen Burniston #1011)
Stitched squares (don't know which set)
Scalloped Squares (Sizzix #657566A)
Wild Cuddly Critters Stamp set (Simon Says Stamp #101704)
Flamingo stamp  (Sizzix #24380)
Distress oxide ink (Tim Holtz) Worn Lipstick & Candied Apple
Fun Foam

Happy Crafting Guys!

ttfn:Karen

Tuesday, August 14, 2018

My "On Your Road to Recovery" Card


I had a friend who needed a card for her son who was recovering from an accident.  She wanted specific sayings on the card.  This is what I came up with.  


What's better than a road on a "Road to Recovery" card?!  So that was my jumping off point.  I used the Upsy Daisy Pop-up Die  (Karen Burniston) and the frames that are also part of the set.  I inked in some clouds & Grass, and freehand drew some birds.  The road die was "Lawn Fawn-Road Border."  The sentiment is computer generated.

(On the next two pictures, I've blanked out their faces for their privacy).  

Under the pink square is a picture of her and her son, and the other two squares contain part of the message with some hearts, one, in each of the frames, is popped up with dimensionals.   The sentiments in the frames are computer generated.  The one on the grassy area is from "Stampabilities."


The white area is where she can sign the card.  I felt that the road needed to be on the bottom of the card, so I decided to be different and place the signature place on the top.   I needed a little height above the frames, so I added hearts suspended on wires.  High enough to bring interest, low enough that he'll be able to read what she writes.  


She loved it!  Yay

I hope you enjoyed today's card.  

ttfn: Karen

Happy crafting

Thursday, August 9, 2018

Sometimes you just want something a little simple....

I am on a mission to use each of the Pop-up die sets that I currently own.  This is my challenge to myself.  Now, granted that isn't all of them,  quite frankly, it's not even close.  But the ones I chose to get were basically ones that were pretty generic. 

Now, don't confuse generic with plain.  These dies pack a punch!  There are many different looks that can be achieved with a generic pop-up die set.  

This time I went for simple.  I  used primarily Karen Burniston dies.  Two current ones (Katherine Label Pop-up & Spinner Square Pop-up ), and one that was  retired (Whiskers the Cat).  The only other die I used was an oval. 


I started with a 4 1/2" x 4 1/2" card base.  The paper was a black and white print that I added some color to using colored pencils, and I inked a border around it using a black marker.  The speech bubble was from the Spinner Square Pop-up set, and then there's Whiskers the Cat!  She's so cute!  


On the inside, more generic black & white paper.  I used various labels from the Katherine Label Pop-up as well as the mechanism.  The flowers & leaves I fussy cut from leftover paper from the front of the card.  The Mouse was from Whiskers the Cat die set.  The texts were computer generated, except for the happy birthday.  That was from an Art Impressions stamp set called "Chocolate therapy."    

Over-all I am pleased with this card.  It was simple to make, but the color pallet gives it some punch!

Just goes to show you.....simple can still be nice!

ttfn: Karen


Sunday, August 5, 2018

Halloween Wonderland


In my last Blog, I talked about mock-ups, and their importance in designing cards.  I  posted a picture of the mock-up design for this Halloween card.  Now you'll get to see the final results.  


This was one time I was really glad to have a mock-up to follow.  This was a complex card, in that there were multiple pop-up elements.  I had a SquareSpinner Pop-up (Karen Burniston Die), a floating floor, and a small pop-up from another one of Karen Burniston's sets.  Oh, and I turned the entire card on it's side.   


Card Front

The card front is made from a combination of die cut images, and inked images.

Inside
Left Side Detail
Here you can see most of the pop-up elements on the left side of the card

Right Side Detail
Here you can view the pop-ups from the Right hand side.


Inside Detail
Here is a close up of the detail on the top of the card.


 If you want some of the details on how this was made, you might want to grab the beverage of your choice at this time.  This might get a little long winded, but I want to be fairly detailed, that way if you're adventurous, you might be inspired to try something like this.


I did a 5 1/2" x 5 1/2" card base.

First off was the spinner card.  There are GREAT instructions from Karen Burniston on both her web page, http://karen burniston.com and also on YouTube, so I don't need to get into that here.  She explains it WAY better than I could, and you can follow along with the videos.

I inked my background paper, and glued it to a card base.  I then added a grassy hill (die cut edges, then inked with Distress Oxides). I then needed to attach the spinner mechanism.

So I created the spinner mechanism for the card, attached it about 1 1/4" from the right edge of the card.  I wanted to add another grassy hill, but needed a support on the left side, so I cut out another spinner card mechanism, and used the box portion only, and glued it to the left side of the card.  

To these platforms, I added the hill with tombstones (die cut, then inked using distress oxides and masking technique).   Pretty straight forward so far. Now comes the floating floor.  

I cut a 4 1/4" x 5 1/2"  piece of grey card stock.  On the 4 1/4" side, I scored @ 3/4", 1 1/2", &  3 1/2".  I cut a slot on the left side of the platform (for the large tombstone),  and did a diagonal pop up on the right side (behind the cat and the pumpkin). 

I attached the floating floor, then decorated it as follows:

 I inked "gravel", and "dirt" onto grey cardstock, then glued that onto the platform, lined the grave with "rocks" made from small waste pieces of a die  (I did stencil ink on the die before removing the individual pieces).  I attached the large tombstone, the cat & the pumpkin. I edged the front of the platform with grass and a ghost.  

The sentiment at the bottom was computer generated.  

Let me know what you think of this card.  It was a lot of fun to design, and assemble.